
Running Scans
This guide explains how to create and manage vulnerability scans in Panoptic Scans - from naming your scan and choosing a scanner through scheduling, time zones, and optional features such as authenticated scanning, attack narratives, and internal network scanning.
Creating a new scan
From the main navigation, go to Dashboard, then click New Scan to open the scan creation form.
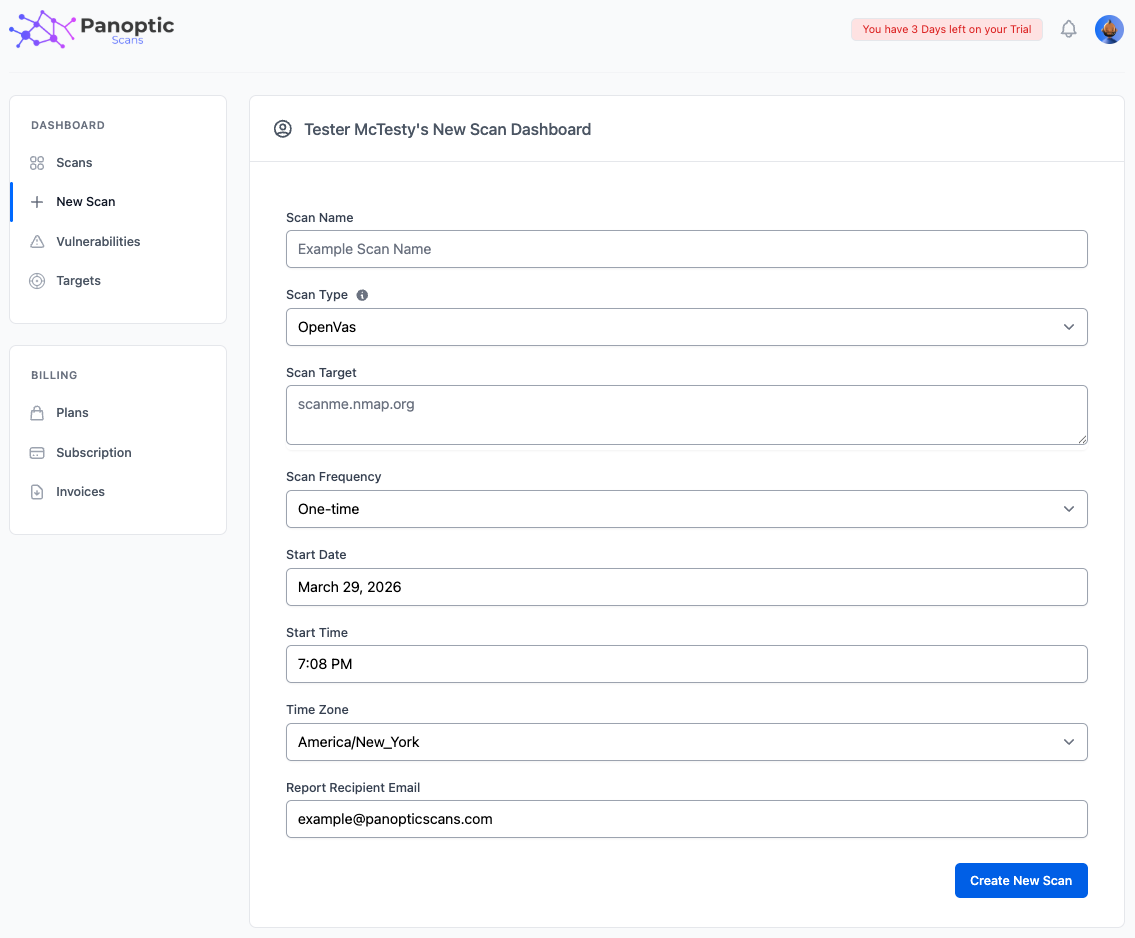
Scan Name
Enter a descriptive Scan Name so you can recognize the scan on your Scans dashboard and in notifications. Names are for your reference only and do not affect how the scan runs.
Scan Type
Use the Scan Type dropdown to choose the engine: OpenVAS, Nmap, ZAP, or Nuclei. An information tooltip next to the field summarizes what each scanner is best for - network and host vulnerability testing (OpenVAS), port and service discovery (Nmap), web application testing (ZAP), or fast template-based checks (Nuclei).
Scan Target
The expected Scan Target format depends on the scan type you selected:
- OpenVAS, Nmap, and Nuclei — Enter IP addresses, hostnames, or CIDR ranges as supported by that scanner.
- ZAP — Enter full application URLs (for example,
https://app.example.com).
You can list multiple targets in one scan by separating them with commas, line breaks, or spaces, according to the form’s instructions.
Scan Frequency
Choose how often the scan should run: One-time, Daily, Weekly, Monthly, Quarterly, or Yearly. One-time scans run once on the start date and time you set; recurring options repeat on the schedule you configure.
Start Date, Start Time, and Time Zone
Use the Start Date and Start Time pickers to schedule when the scan should first run (or when a one-time scan should execute). Select your Time Zone so schedules match your local expectations - the selector can auto-detect your browser’s time zone.
Report Recipient Email
Set Report Recipient Email to the address that should receive completion notifications and report delivery. This field defaults to your account email; you can change it if reports should go to a different mailbox.
Optional features
Authenticated scanning
On Basic, Premium, and Pro plans, ZAP scans can use authenticated scanning: Panoptic runs a Selenium-based login script so ZAP can test areas behind a login. Enable the checkbox, then upload your Python script (exported from Selenium IDE). See Authenticated Scanning for full steps and requirements.
Attack Narrative
On Premium and Pro plans, you can request an Attack Narrative - an AI-generated description of how an attacker might chain findings - when configuring eligible scans.
Internal Network Scanning
On the Pro plan, OpenVAS scans can target internal or private networks. Check Enable Internal Network Scanning to switch to that mode: scheduling controls for cloud-managed scans are hidden, and the form shows VM requirements because the scanner runs on infrastructure you provide. See Internal Network Scanning for setup details.
Managing scans
Open the Scans dashboard to see all scans. From there you can:
- Edit a scan to change its name, targets, schedule, notifications, or options (where allowed for that scan type).
- Rerun a scan to queue a new execution with the same configuration.
- Delete a scan you no longer need.
Warning: Only scan systems and networks you are authorized to test. Unauthorized scanning may violate law and policy and can disrupt services. Confirm written permission and scope before running any scan.